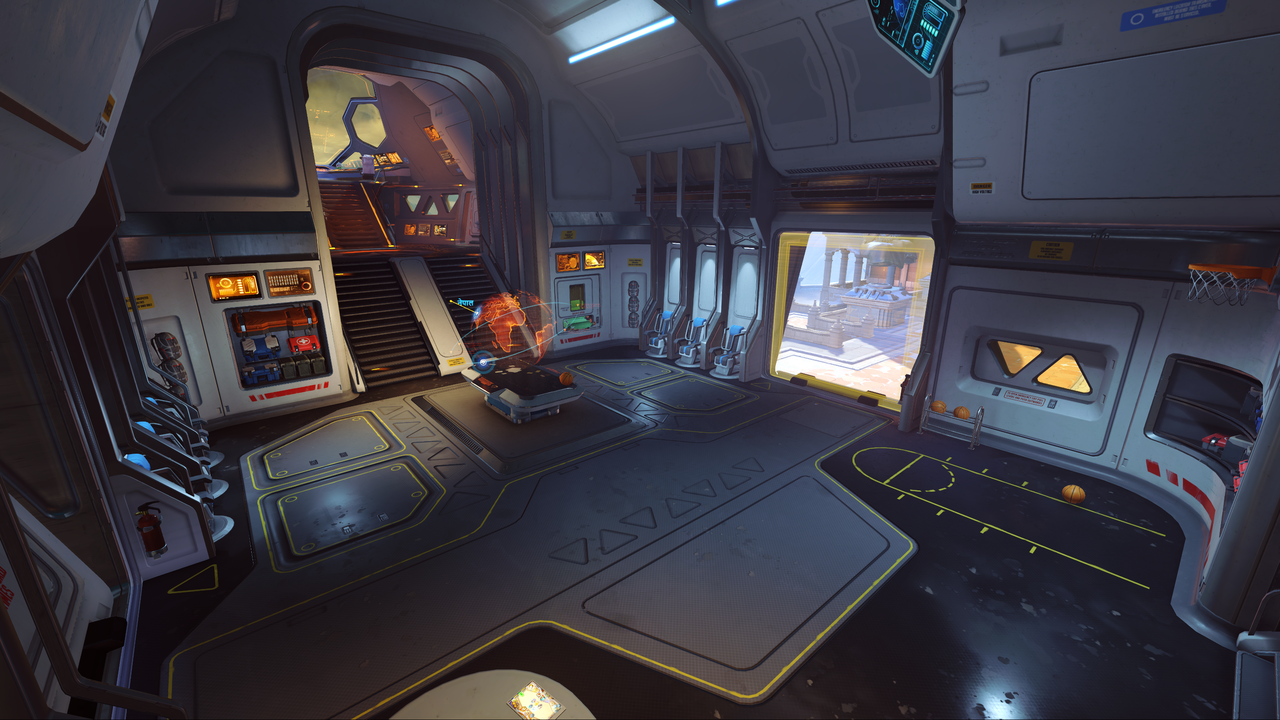
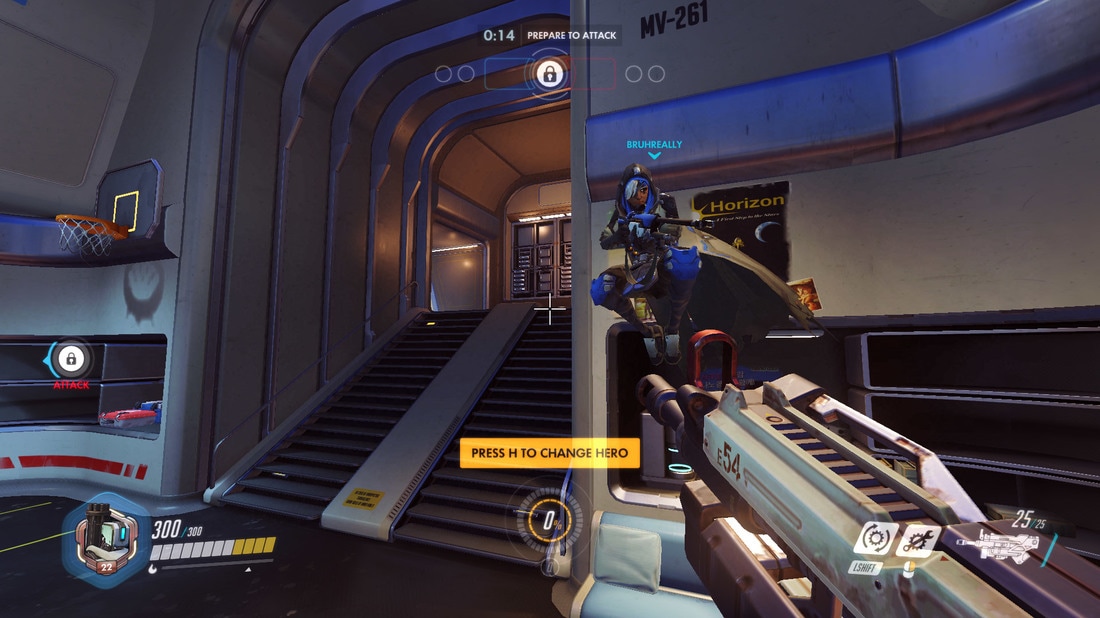
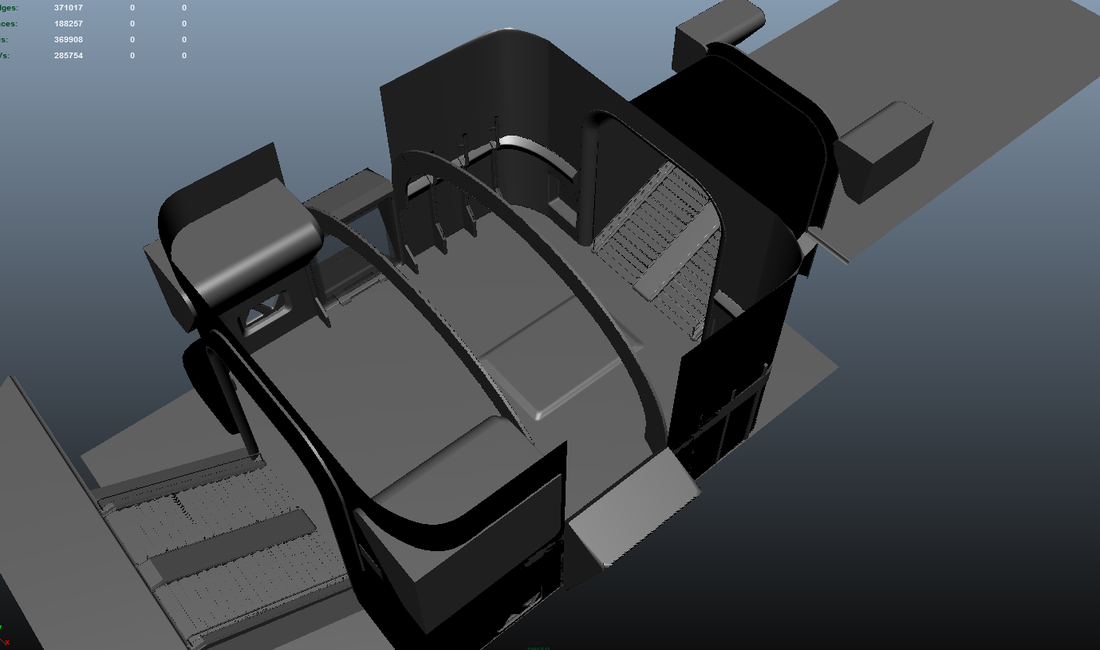
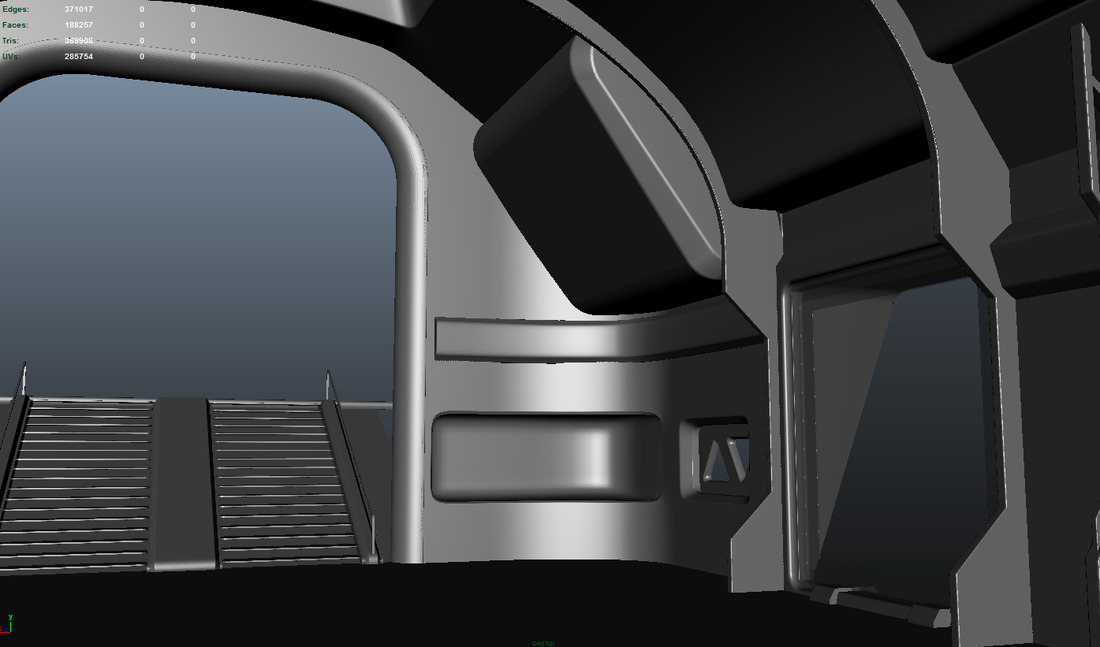
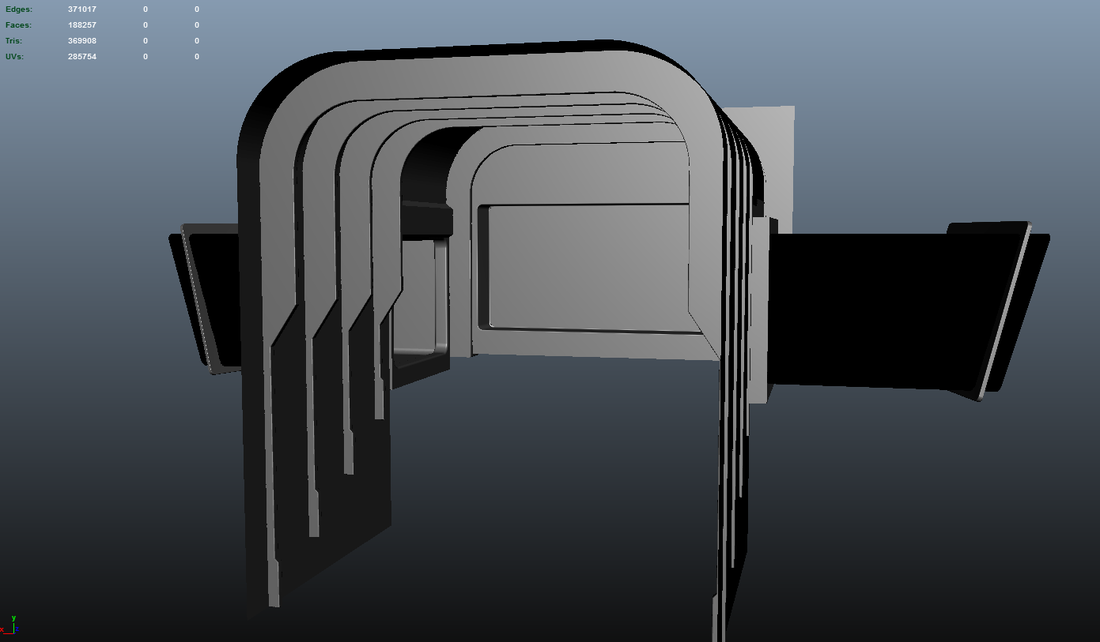
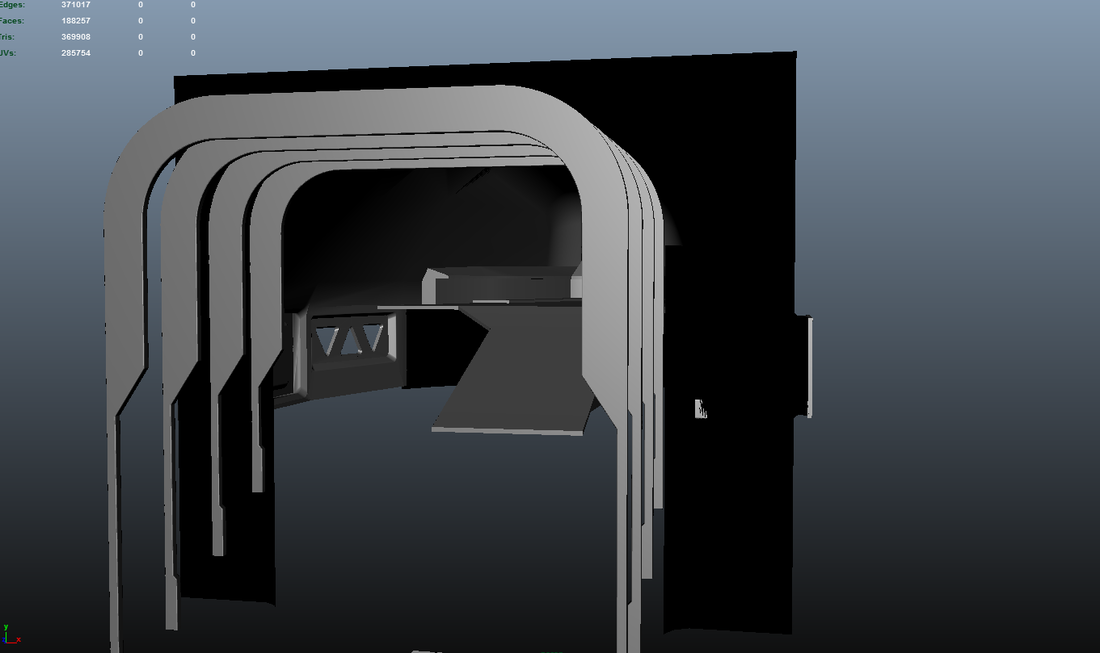
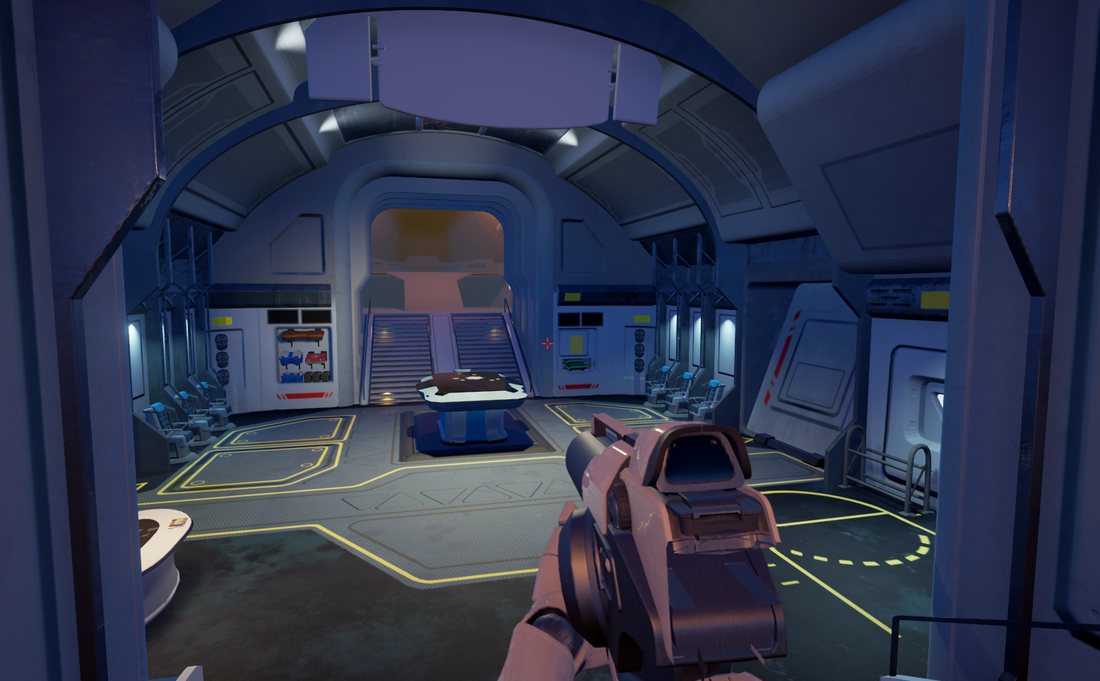
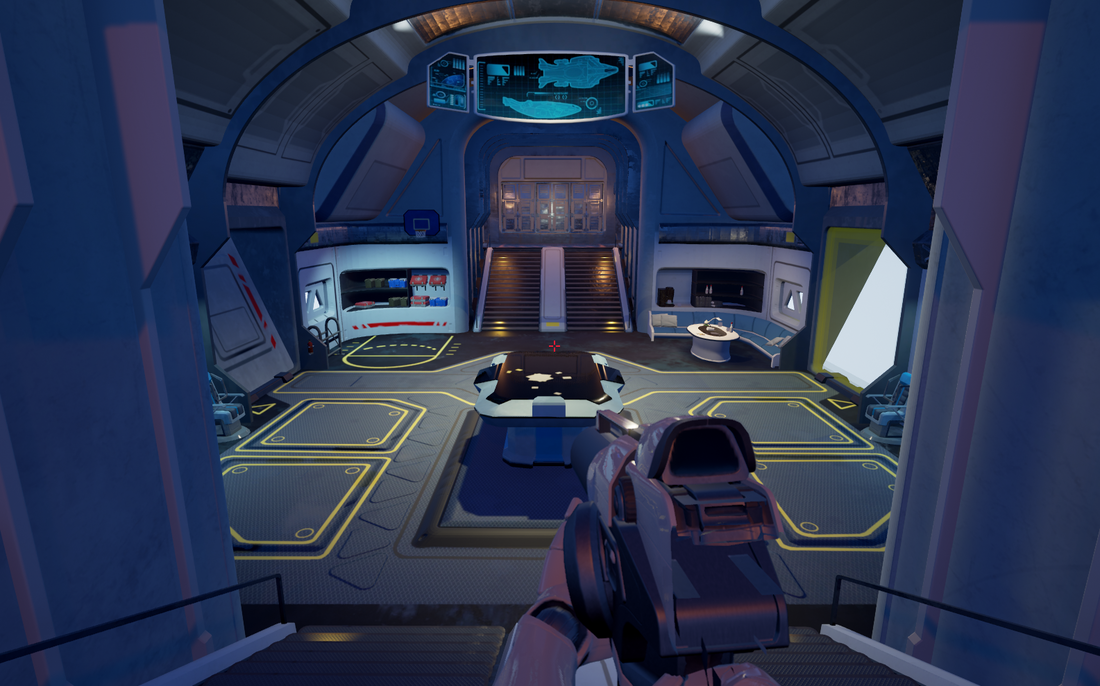
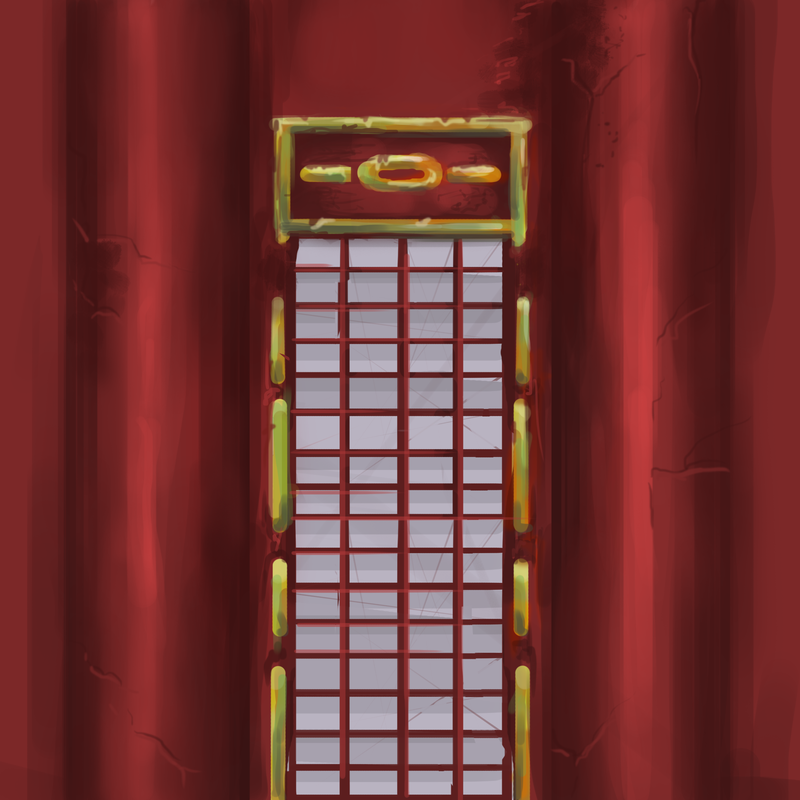
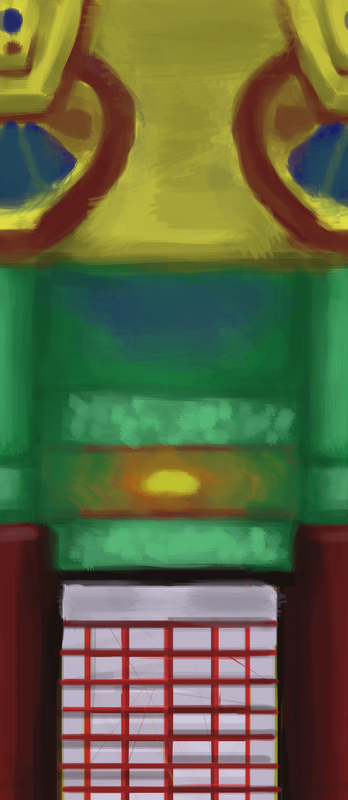
The Challenge: To reconstruct a video game of our choosing demonstrating polygon modeling techniques and instituting Levels of Detail (LODs) and using a video game engine. Step One: SelectionAlways one of the hardest decisions. Of all the video games, we had to choose one. Through much deliberation our team of three decided upon the scope and goal of this spawn ship from the game Overwatch. A manageable yet ambitious scope.
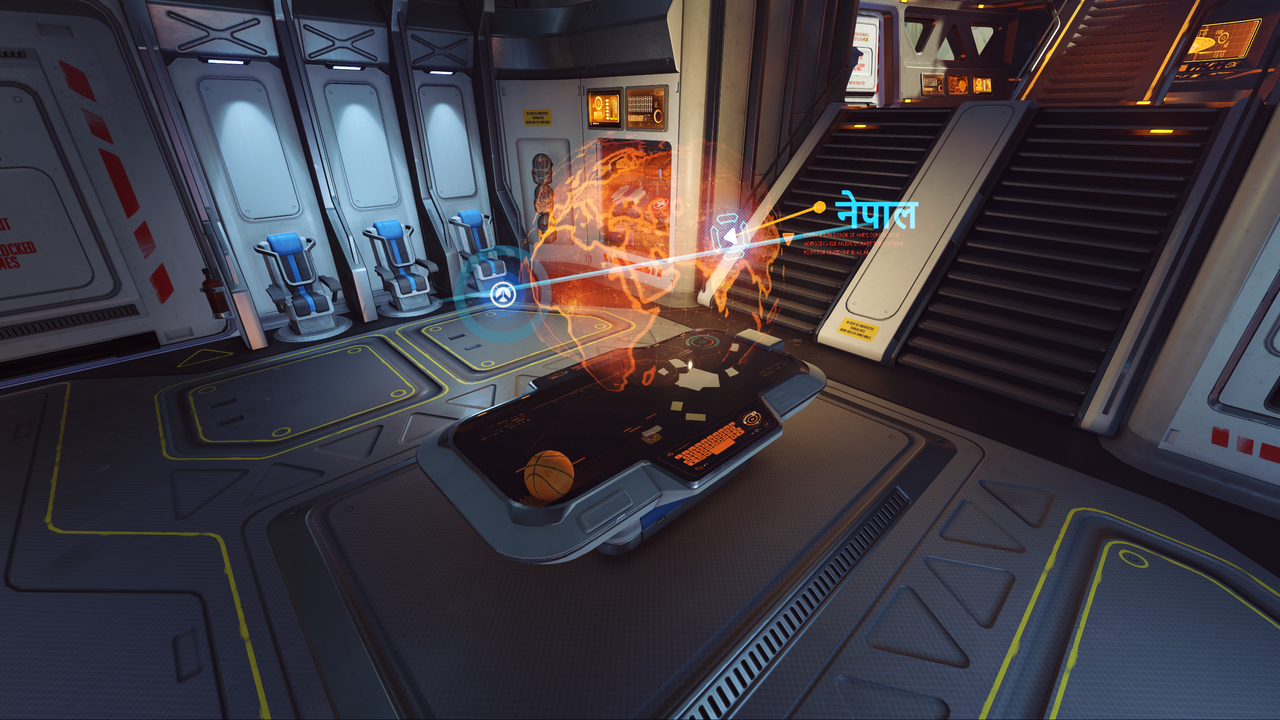
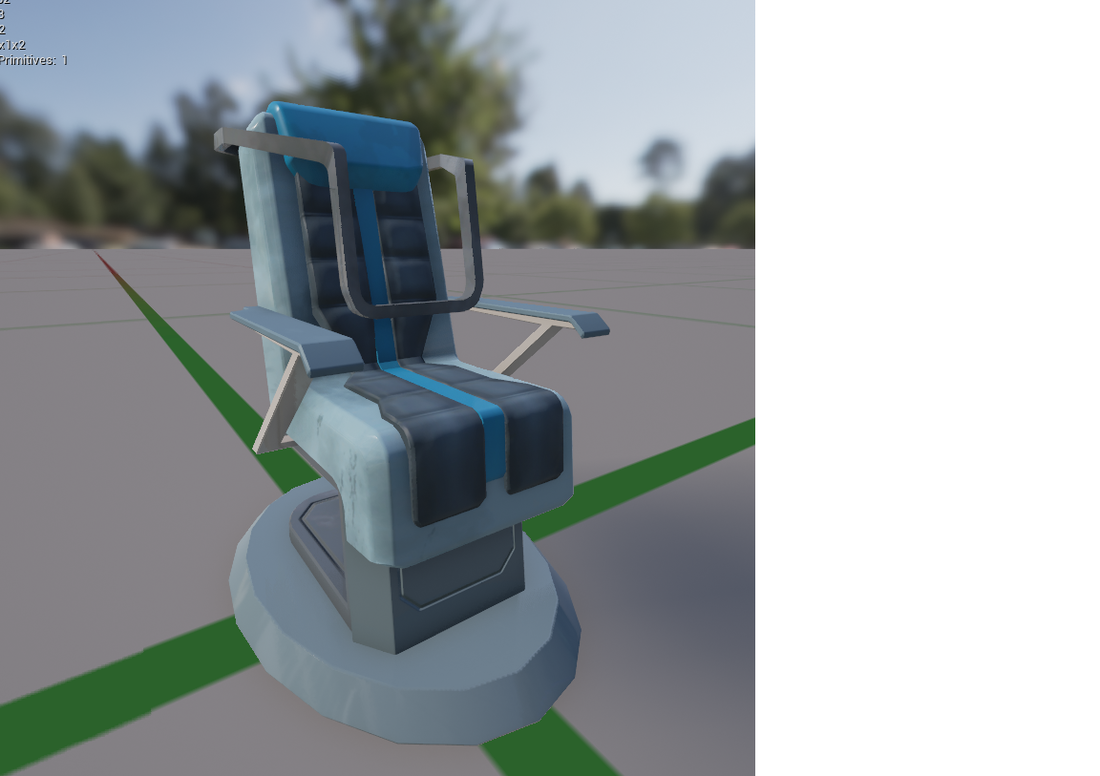
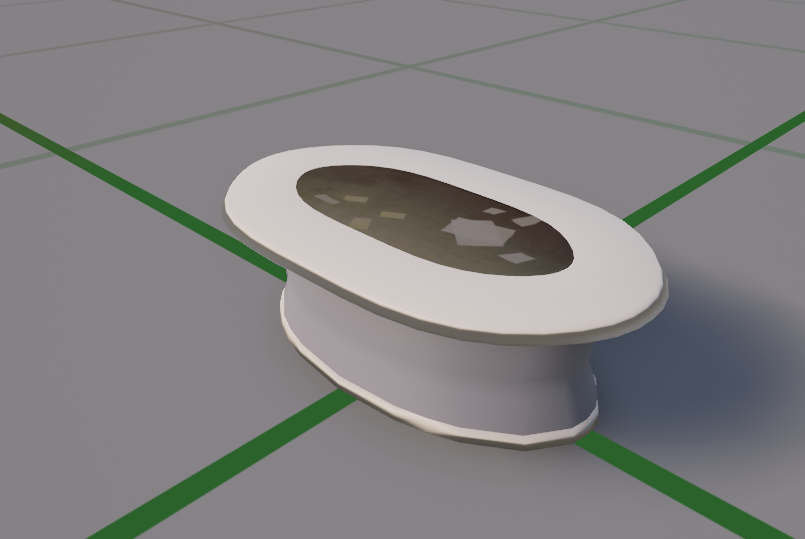
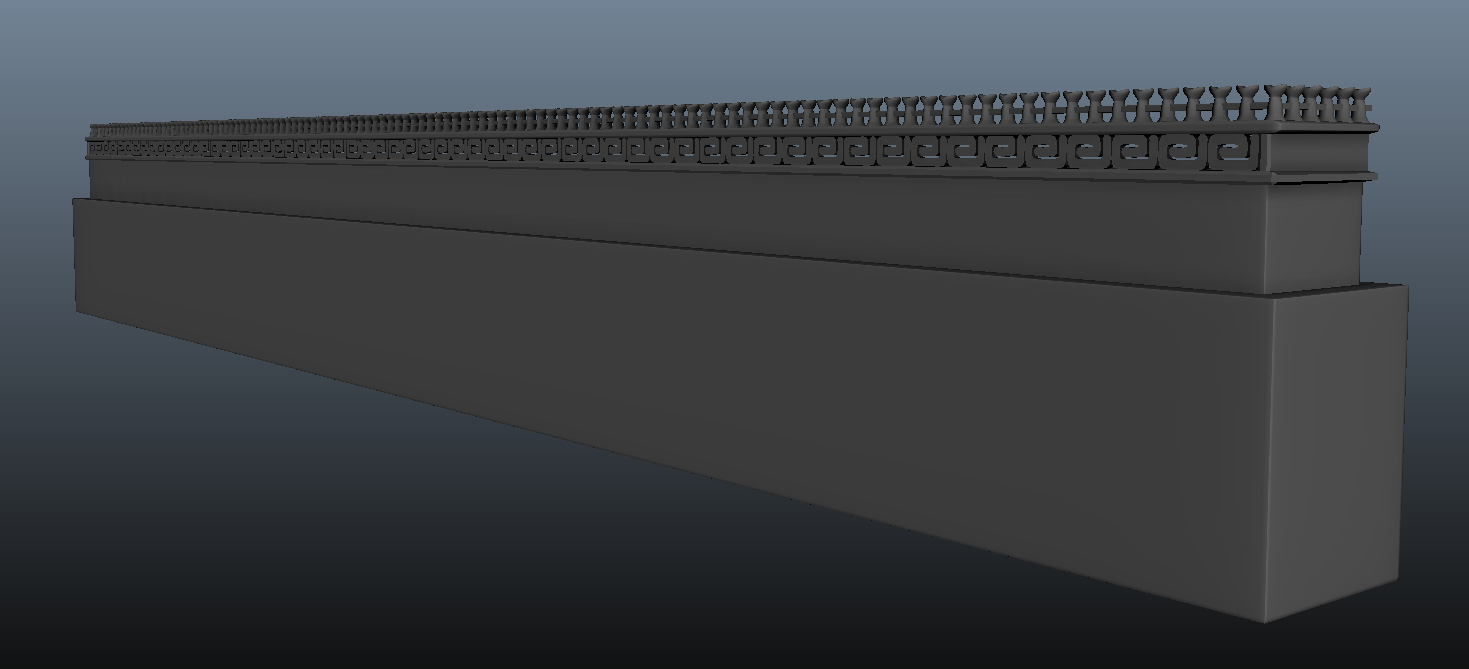
Step Two: ReferenceWe then got the game and took over 300 screenshots of the level for reference. As well as multiple videos capturing the depth and angles of the room and the objects inside. Which was only available online, so we got a few weird faces while spinning in circles taking pictures. Step Three: ModelingWe than broke up the models and got to work! Gary started modeling the building structure itself. Using mainly planes, he sculpted and beveled the edges of each piece and support. Meanwhile, Ryan and Ritisha modeled the props and supporting assets that would fill the scene. From tables and chairs, to bottles and containers.
Step Four: TexturingA large portion next was texturing! Unable to texture until the modeling was finished and refined, it took a while to get started. But once they were finished, textures slowly started going up and completed the models. The building was coming together piece by piece 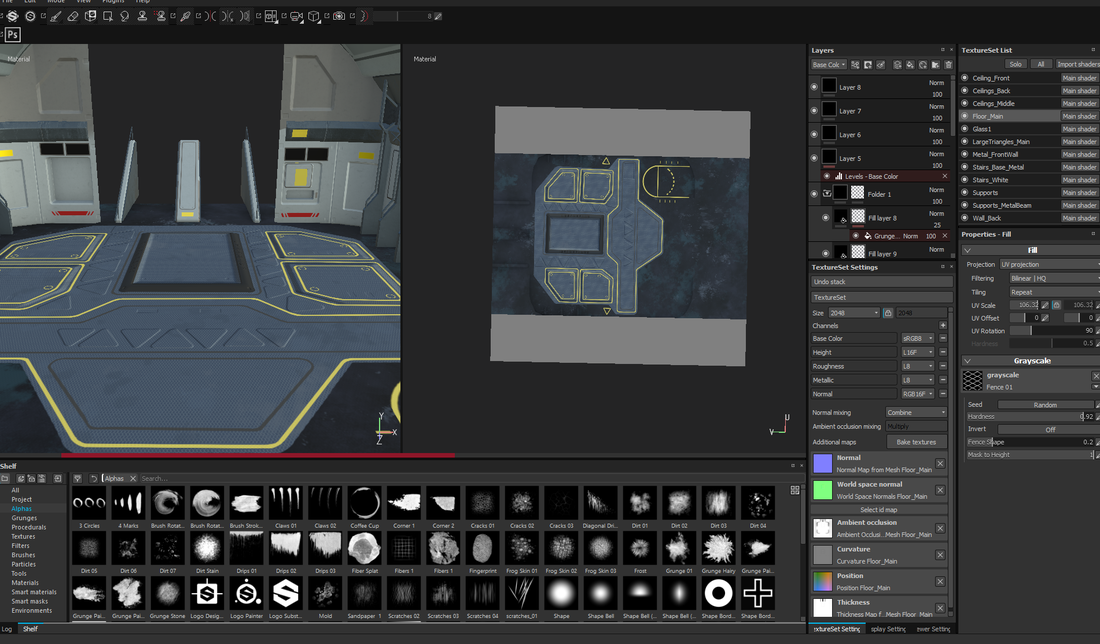 Step Five: Importing into EngineNext step was getting all the assets together into the engine. Between importing models and linking textures, this proved to be a tedious task. But immediately it was almost playable and cool to begin interacting with. Step Six: LightingThen came the artistic touches. Bringing this environment to life and making it look believable with a complicated lighting set up. Our scene was covered in small lights attached to almost every wall, as well as the overall scene lighting. At this point unreal started to act up and do some crazy things. 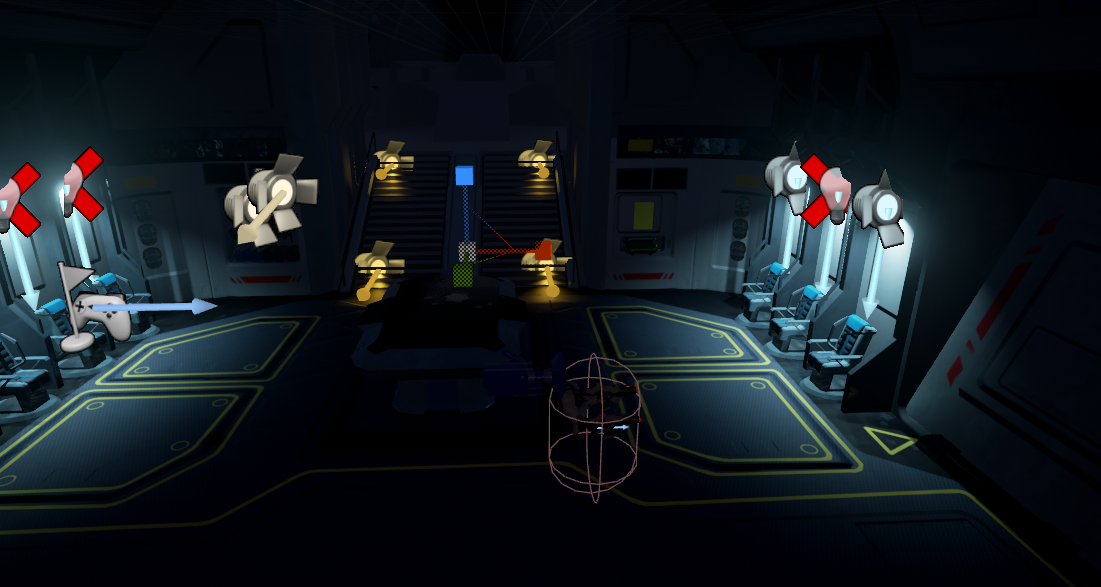 Step 7: LODsThen what was left was implementing the LODs for the models. We quickly realized that our character never gets far enough away for them to really make an appearance. But nonetheless, they are implemented. Final Product
Done and complete. The room is beautiful and playable!
1 Comment
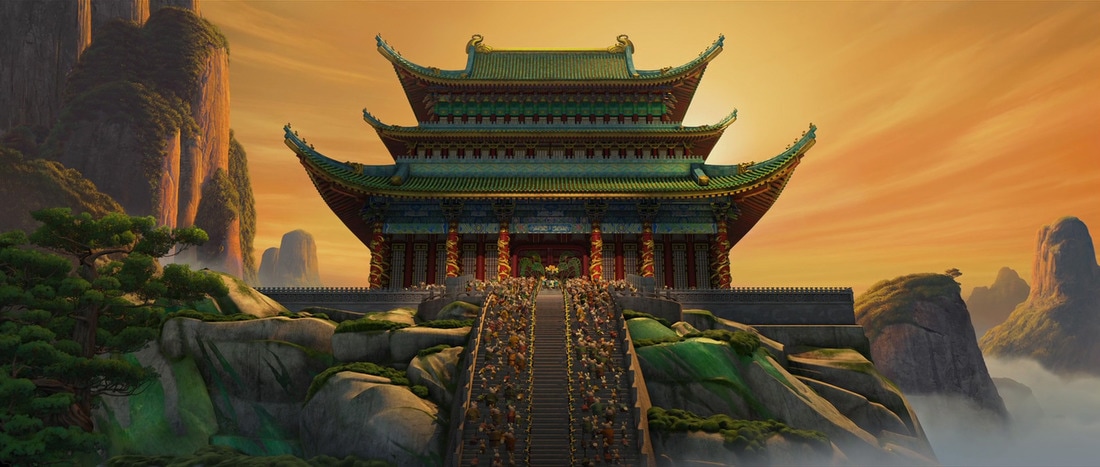
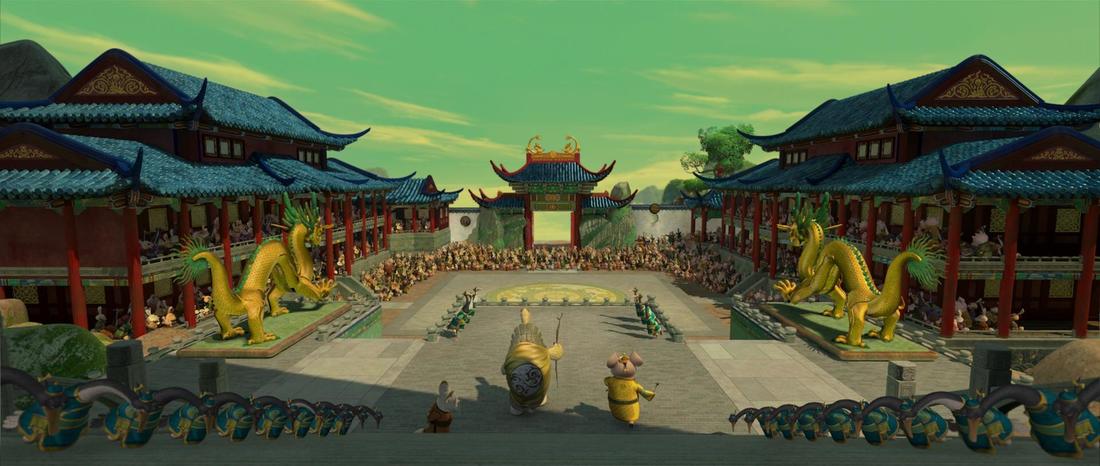
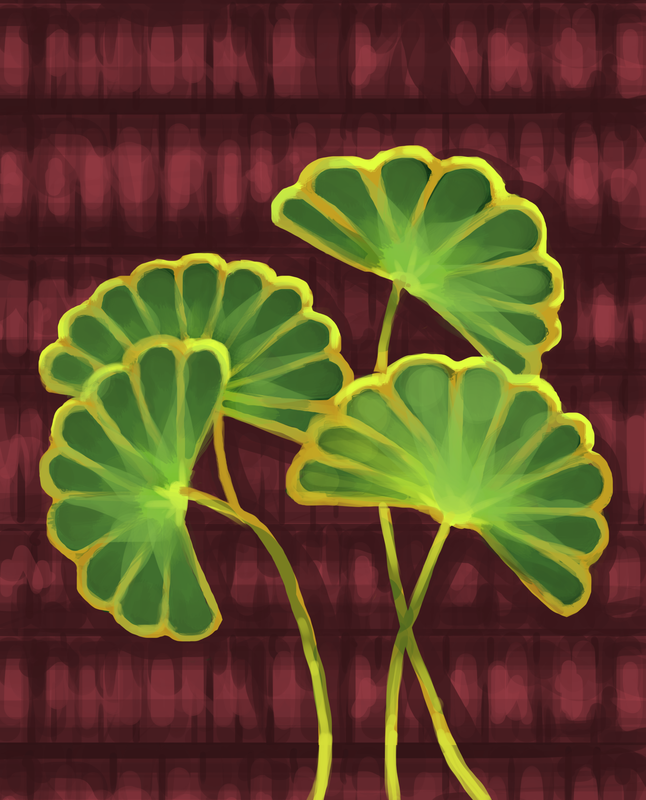
The ChallengeTo create a digital set to match the image from an existing CG movie. The scene should include a natural phenomena, be modeled using only SUB-D's, and be apart of a five second animated set. Step One: CG Movie SelectionWe immediately left the gates running! We began to look up all the best animated films that come to mind. Eventually landing on the film Kung Fu Panda. We knew that our team wanted to create something with a complex model and a very textured and beautiful scene. We found two scenes that intrigued us.
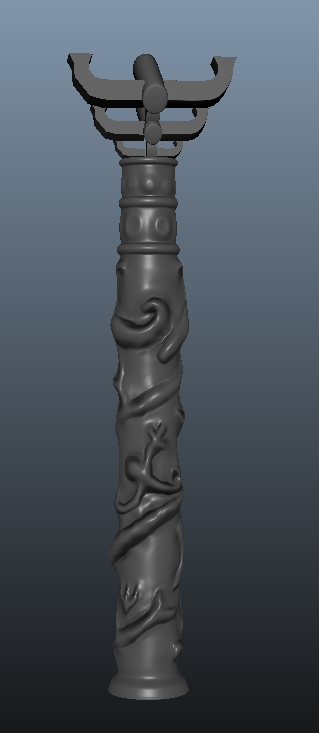
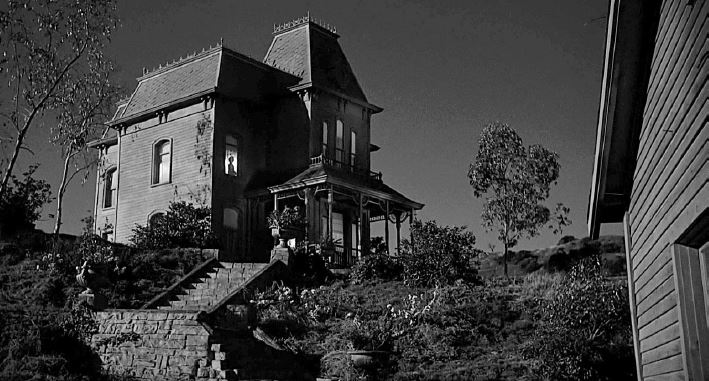
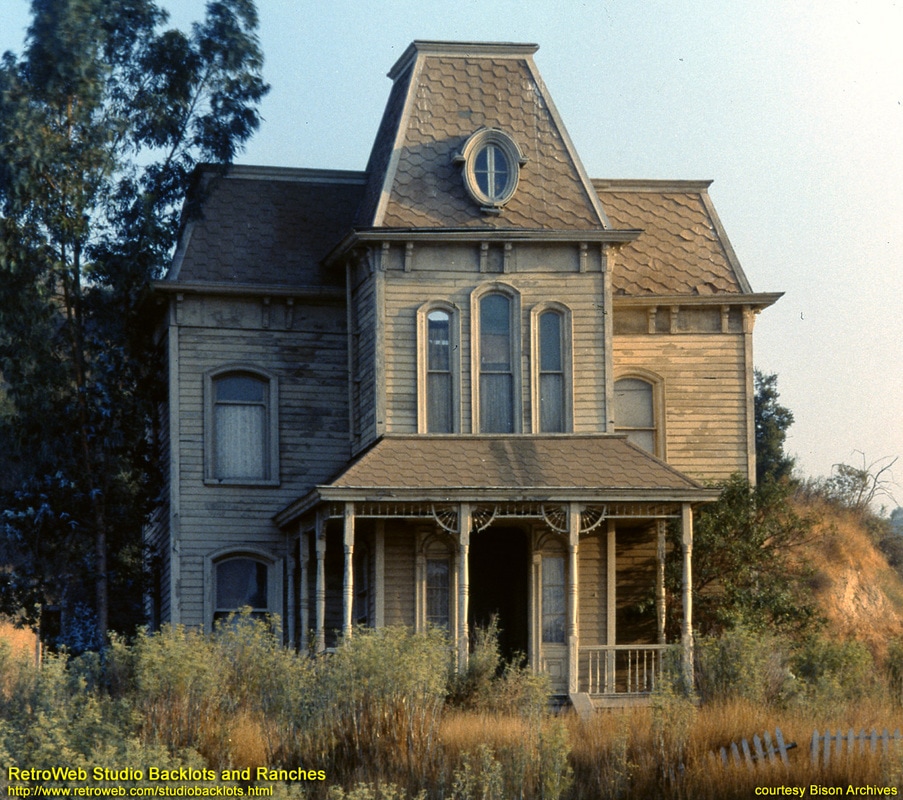
Upon much discussion, we decided on the first image. It fit our scope of three weeks better, while showing off a range of skills. This scene also is more striking of an image. Step Two: Splitting up the RolesWe then discussed our strengths and weaknesses as a team and decided our tasks for the project, beginning to end. Modeling Matt: The rocks and staircase Ryan: The moss, sculpted elements of the palace, and the palace foundation Katelyn: The structural elements of the palace Katie: The Tree Surfacing Matt: The stairs and foundation Ryan: The rocks and moss Katelyn: The architectural pieces of the palace Katie: The palace patterns Lighting Katelyn Rolling Fog Effect Katelyn Matte Painting Katie Step Three: Modeling BeginsWe split up and went to work. Each person worked on their piece of the pie. Matt created the stairs and rocks to go in front of the palace 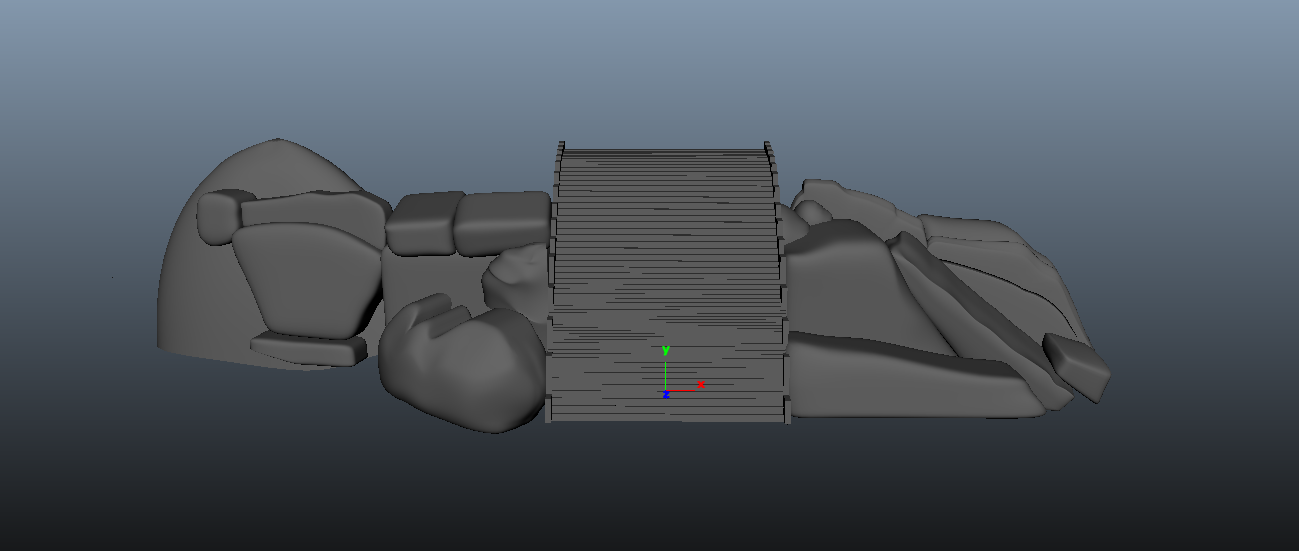 Ryan quickly modeled the foundation of the temple using duplicate tool, then sculpted the "elephant" topper, the roof dragons, and the main detailed pillars in Mudbox. Overall, they are a tad messy-looking, but they are seen from a distance so they work perfectly for the scene. Katelyn put her head down and created the structural foundation of the Jade temple 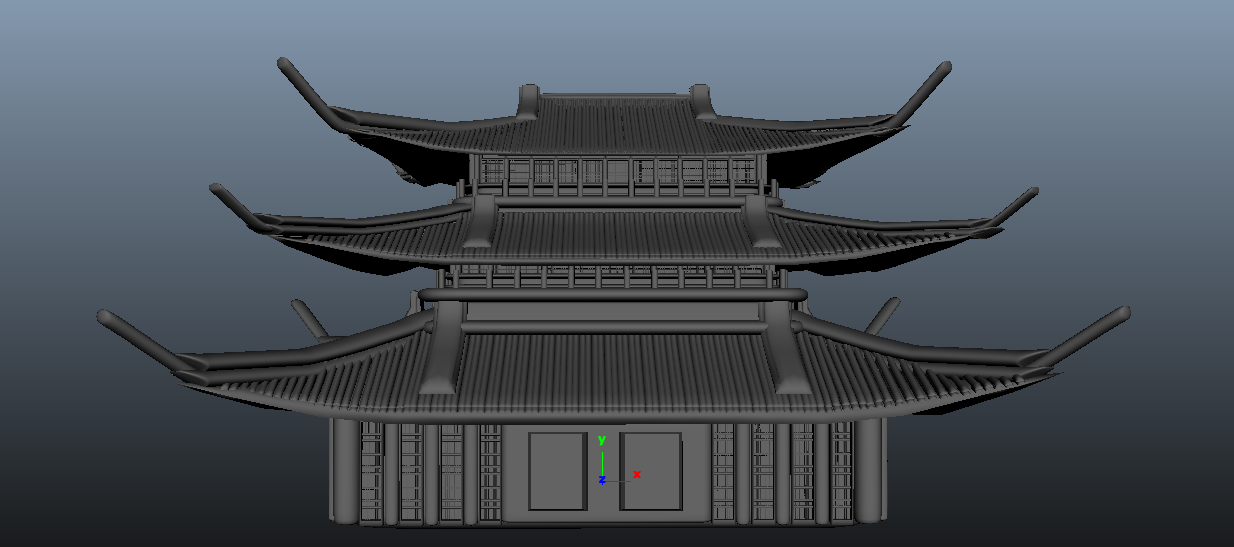 Katie modeled and textured the tree, and then created the leaves to match the reference 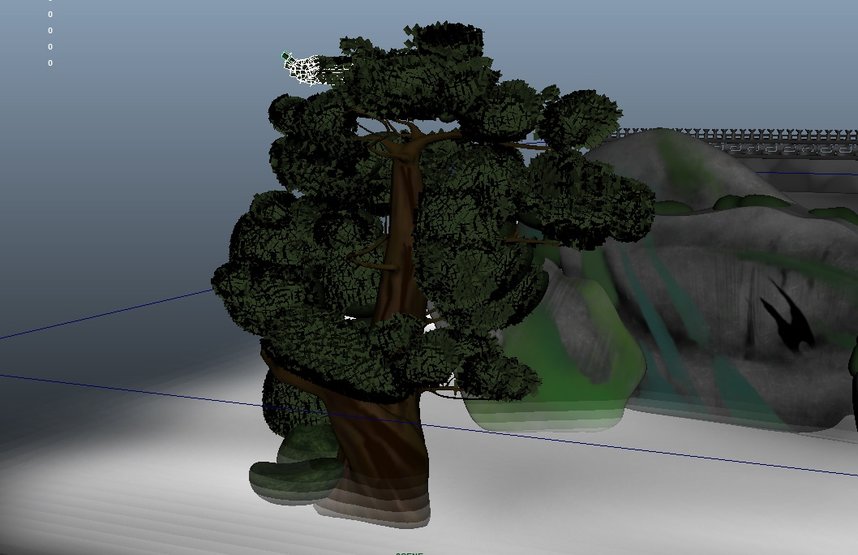 Step Four: Set Dressing and Reference MatchingOnce all of the models were created, Ryan went through and created a master file and matched the reference as close as possible. 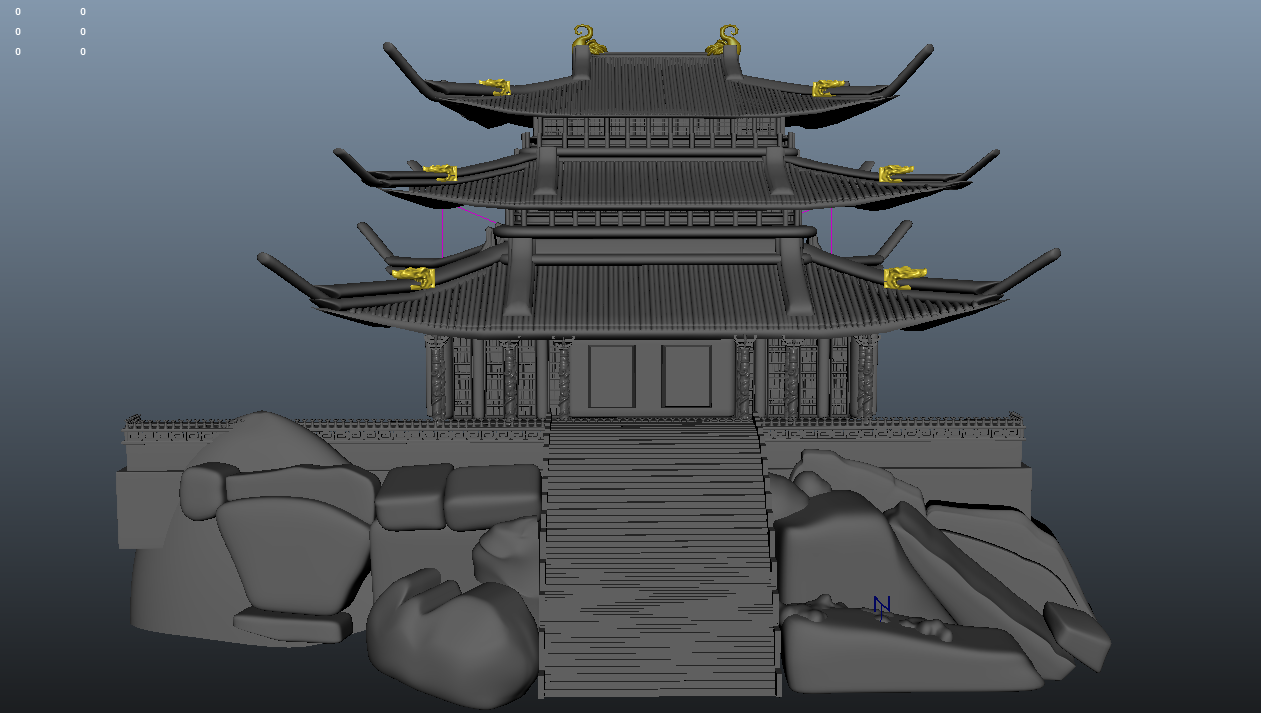 Once the scene was collected, Ryan realized that some parts didn't match up with the reference exactly. He then went in and addressed these issues in the model and tried to match this up as close as possible. Using the soft select tool, to achieve the bend in the roof, and the duplicate tool to achieve the railings, roofings, as well as, the multiple tiers. 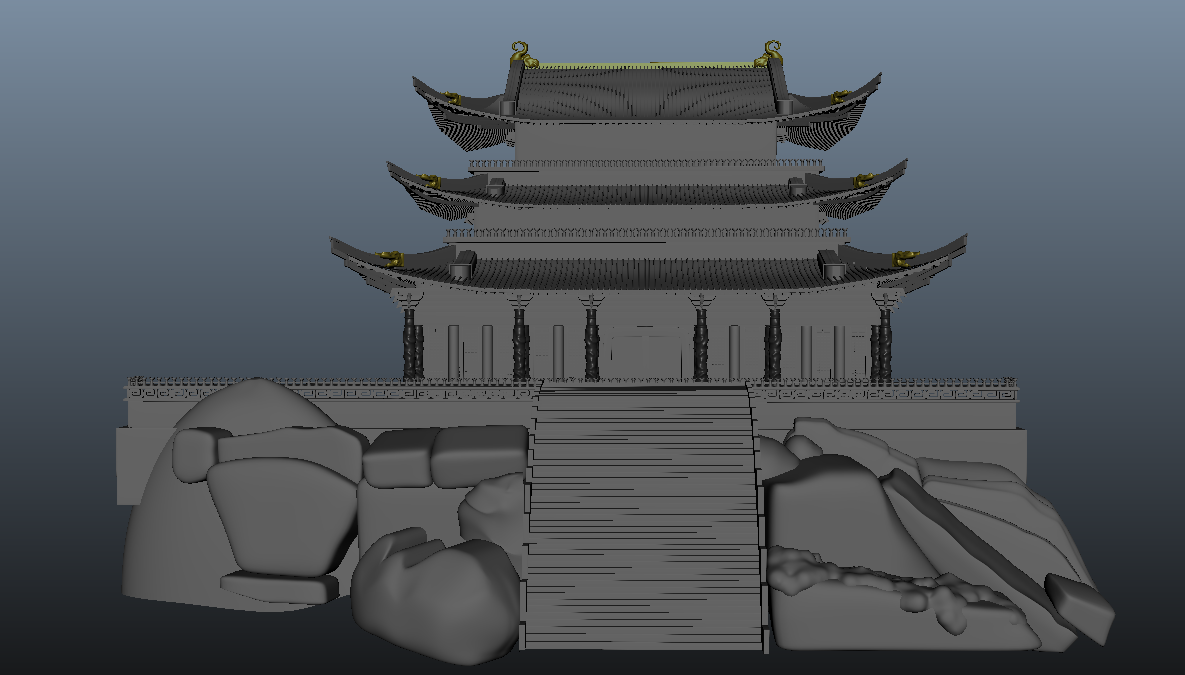 The retouched version was then ready to be surfaced Step Five: Surfacing the SceneWhile the models were being finished, Katie went to town on the painted textures for the palace. She created the patterns for the lower hang, and tillable textures for the main faces, so that when the models were completed she could slap them onto them and adjust. She then began to create texture after texture, for the rocks, the roofing, and the door. She used a mixture of Photoshop, Substance Designer, Substance Painter, and RenderMan materials. Here are just a few of the hand painted textures. At the same time, Matt was texturing the foundation and stairs to round out the textures. 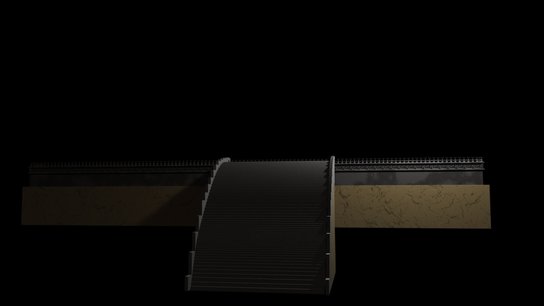 Step Six: Adjusting for Incomplete ModelsAs textures began to be placed, we realized that a part of the stairs was incomplete, the roof panels were misplaced, and the moss needed to be modeled. Ryan tackled these. Not knowing the best way to go about creating this natural model. He asked his peers and discovered a technique called Metaballs. In which, you can create spheres that when colliding, morph into one another. This technique worked very well and the moss was created. The stairs were missing a simple addition of a cylinder, railings, and another layer of stairs, these were quick and easy. Lastly, the roof was a quick soft select to move it back into place. 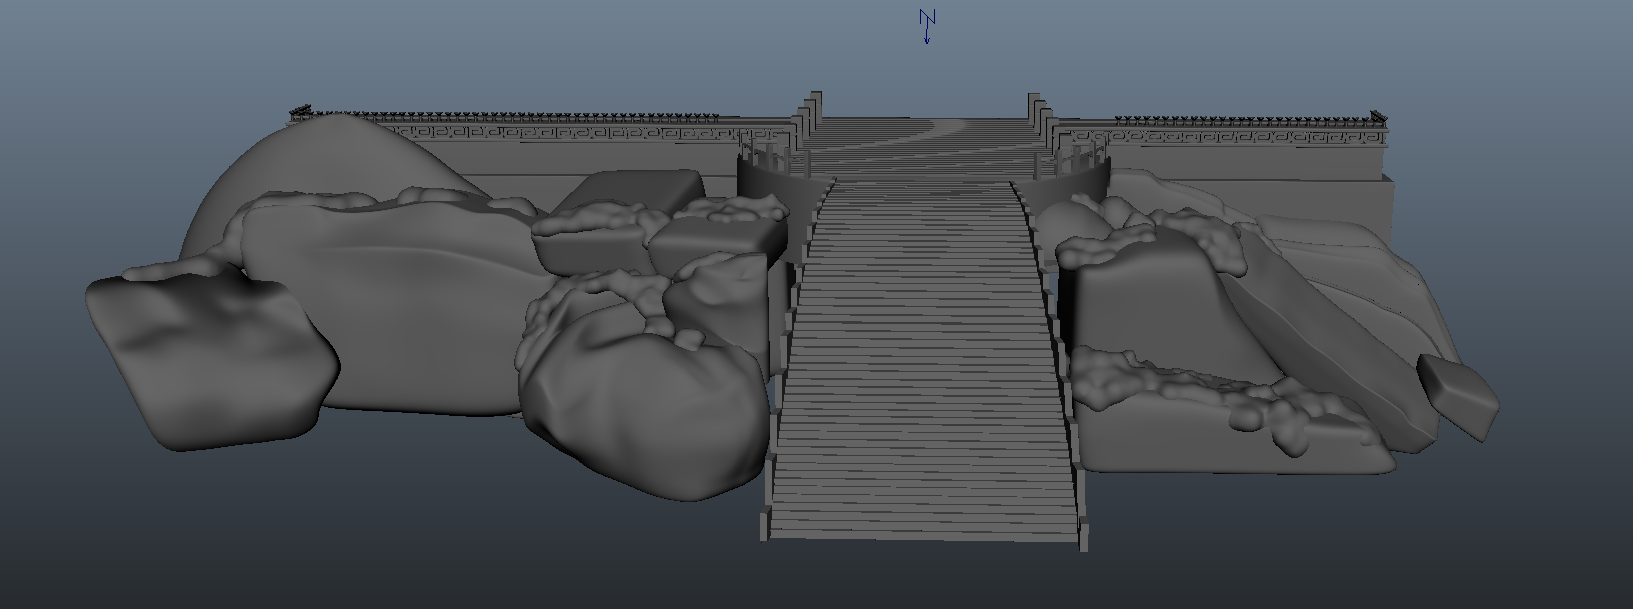 Step Seven: The Rolling Fog EffectKatelyn tackled the natural phenomena using maya fluid effects. She went in and tweaked the settings to achieve similar results from the still reference photo, to achieve the animated motion we were thinking of.  Step Eight: Finalizing texturesAt this point, most of the scene is completed. The main remaining pieces are the final textures. Due to the large amount of different patterns and panels, Katie was continuously pushing out the texture, but they took time. Nearing the end, Ryan and her combined to finish the remains textures for the moss, pillars, and panels. 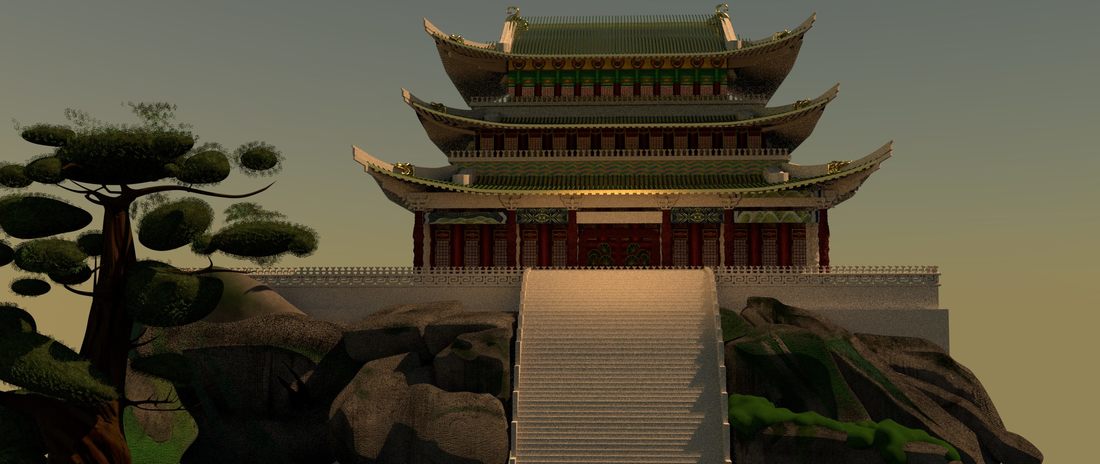 Step Nine: Lighting and Color CorrectionAs the textures were being finalized, the lighting was being tweaked along the way. Katie set up the initial lighting of the scene.then others got on an tweaked it to completion. As the lighting was nearing the end, the textures became less vibrant than the reference. Katie went in and adjusted those accordingly. She first matched the correct base color to the lighting, then went in and adjusted the texture to the new color. 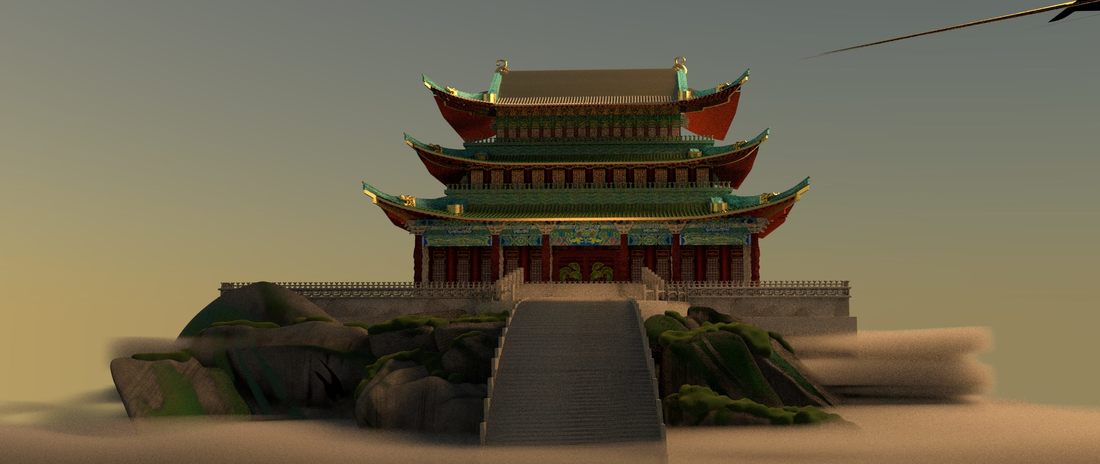 Step Ten: Rendering and CompositingWe decided early on that the best way to render was in layers. Because the camera doesn't move, we only need a single frame render of the house. The other part of the scene is the fog, which we decided to render out with the rocks and stairs to simplify the scene and to negate the background fog. 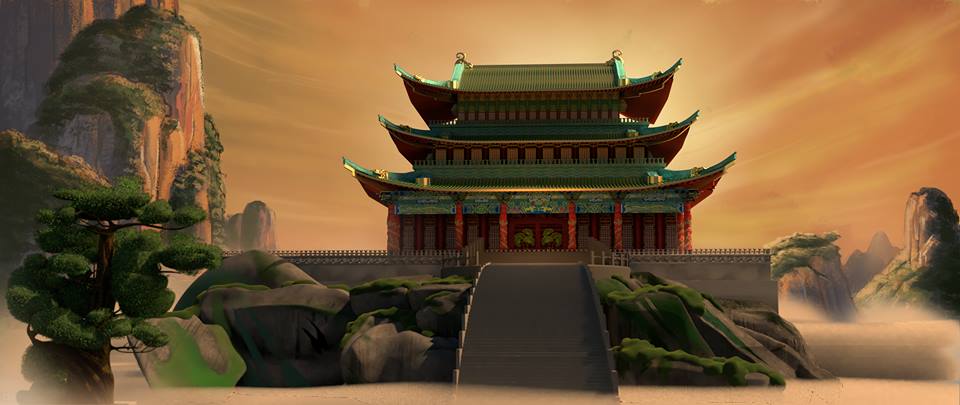 Step Eleven: The Final ProductThe ChallengeCreate a set extension to match a still frame from a B/W movie. The modeling must be done using only NURBS, and combined with a real-live plate that we took ourselves. Step One: B/W Movie SelectionI began to search the internet to find a compelling shot from an old black and white movie. I searched through many movies including Citizen Kane, Sunset Boulevard, and the Grapes of Wrath. I finally landed on the 1960's Psycho. A classic movie that features a large house behind the Bates Motel. I then was tasked with creating that house and then compositing the rest of the elements into the photo. 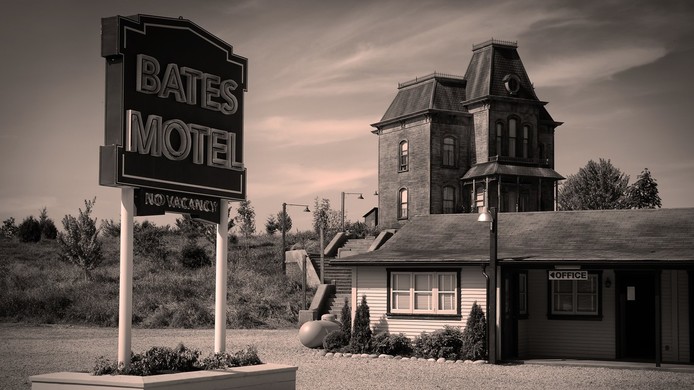 Step Two: Reference CollectionAfter selecting the image above, I began to look up reference from multiple angles of the house. Being a famous house, it was not that difficult. Step Three: NURBS ModelingAt the announcement of only able to use NURBS to model, I was quite unsure of how to do any of this. I had absolutely no experience with NURBS and hardly knew what they were. But I faced it head on and began to test what each command does and looked for tutorials online to help get started. I started creating the wall and window of the lit side of the house. 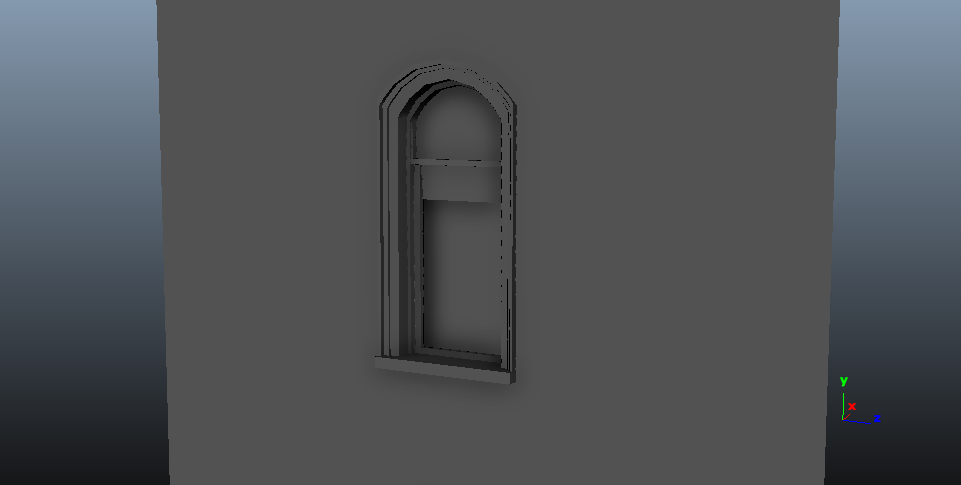 Using curves and projections, this modeling technique threw me into the unknown and out of my area of expertise. However, I began to pick it up. I created the window and that side of the house, then was able to take those foundational pieces and duplicate them over and over again to create the main frame for the entire house. 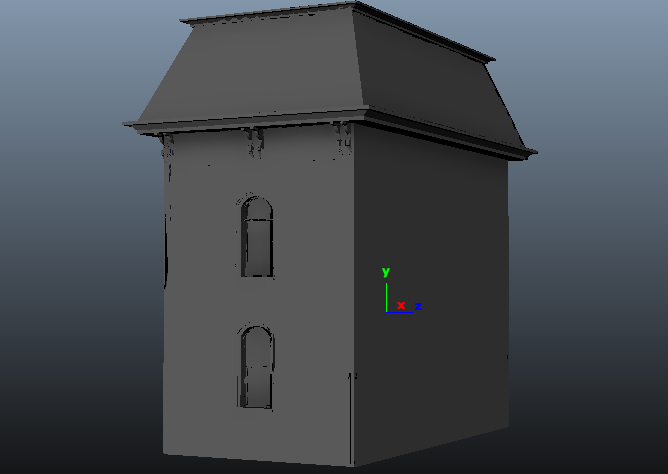 Then it came down to a matter of going in and adding the details. Creating a duplicate special for the spikes on the roof, tweaking the window and window frame positions for each window, and creating the individual circular window in the front. But this quickly formed 90% of the house. 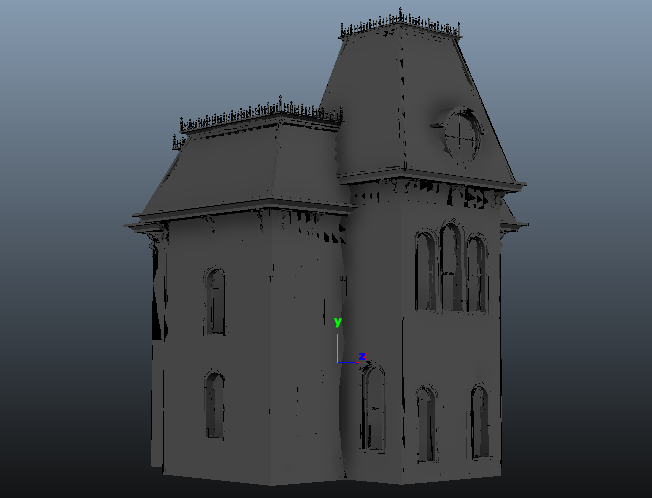 Last was the front porch. After creating the spikes on the roof, this was a very similar process. I started with revolving around curves to create a post and then using a duplicate special for each of the beams to create the equal spacing and the number I want. The only thing I actually had to really create individually fro the porch was the wheels at the top of the posts. But upon completing these final steps the house was completely modeled. 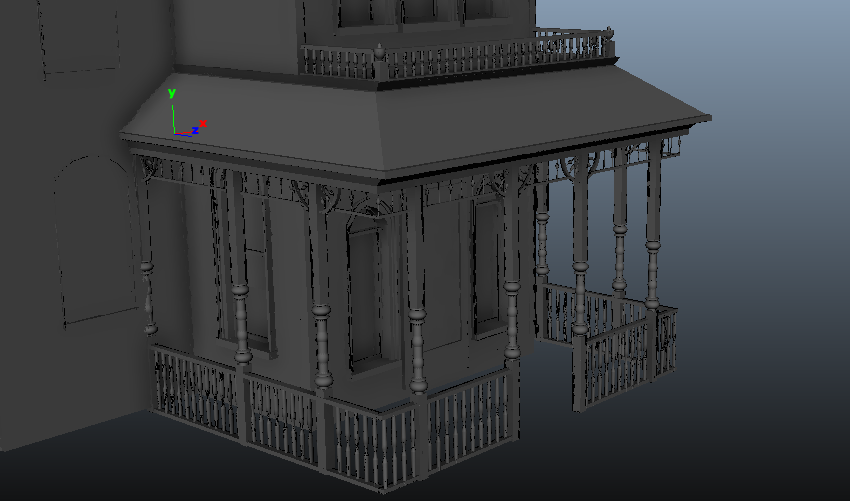 Step Four: Perspective MatchingNow that the model is complete, I then placed the reference image into the scene and tweaked the model a little here and a little there to get it to match up as close as it could to the reference.  Upon seeing the house in the frame of the photo, I realized that the house only took up a small portion of the whole scene. Therefore, it didn't show off my work as well. So i switched photos and took the same house and found a closer shot, showing the house off more. Step Five: Adjusting for the new photoWith this new photo, I now had to match the house I created to what it looks like at this point in the movie. Taking a closer look, I also realized that the house isn't exactly the same from picture to picture. The stairs infant are completely different, the window frames are in different positions, the roof spikes are different, and just small things here and there I had to change. After I then matched up the new perspective.  Step Six: Modeling Some More I decided once everything was ready to begin surfacing that I could model the building on the right edge of the screen quickly. So I did some quick duplicating and modeled the right building to fit the perspective of the already completed main house. Step Seven: Surfacing... finallyLooking at the house in the photo, there isn't much small details that you can see from so far away. This made my life a lot easier. I simply had to create three or four main textures and tweak them for the whole house. I needed a wood siding, a hexagonal roof, a trim, and a single wood beam texture. I created each one of them procedurally in Substance Designer so that they could easily tile onto the house in the way that I needed them to. 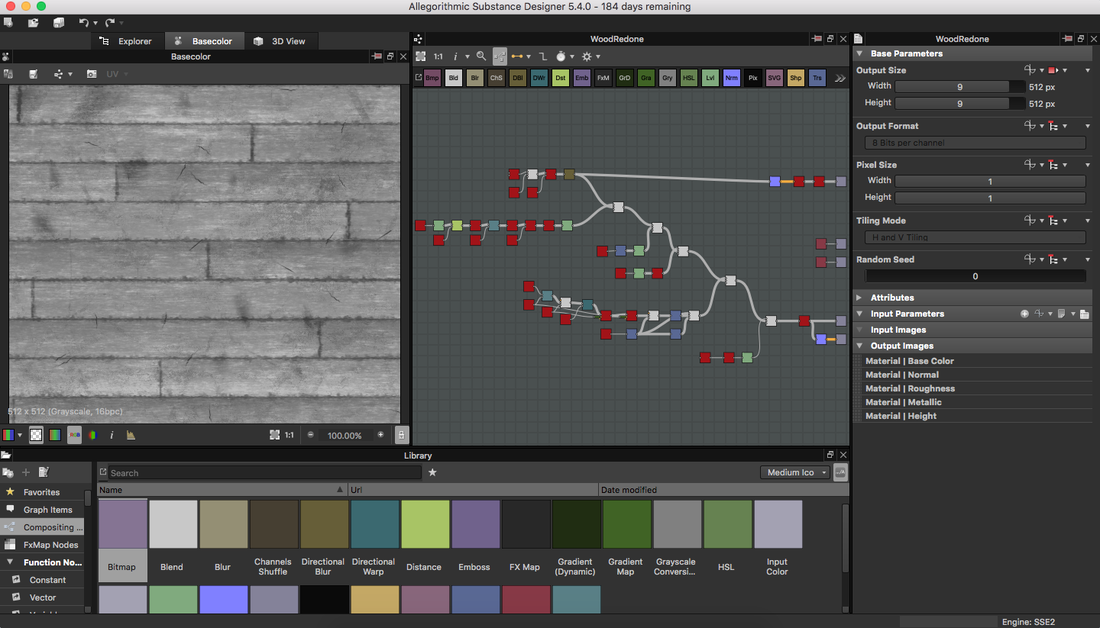 Step Eight: LightingThe first image that I was going to create had a super simple single light source set up. I then switched photos, and the lighting immediately became much more complicated. With the different lights around the front illuminating the dark faces and a light coming from the lit window. As well as the second building in the front, with its own set up. Step Nine: Quick CompositeI then decided to get a good idea of where everything is with a quick composite of the different elements. I took my personal photo of shrubs on a small hill, placed the rendered image from Maya on top, and then took the original stairs from the reference photo on top of that. From this composite, I got critiques as well as a clear picture of what I needed to change in order for it to become as accurate as possible. 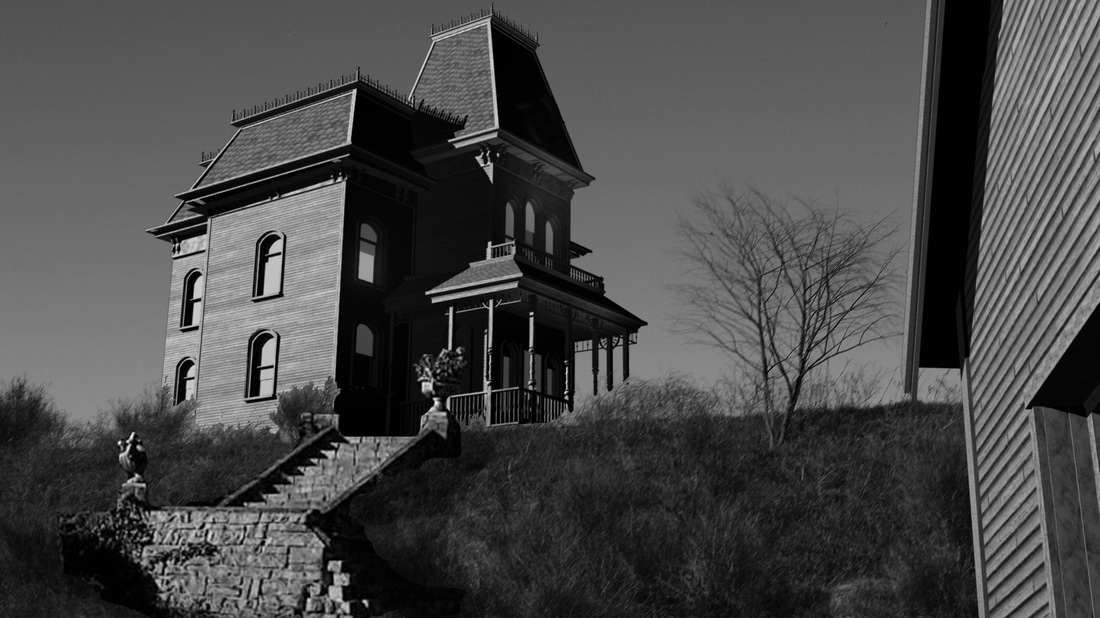 Step Ten: Touchups, Tweaks, and IterationsI took the critiques and started to spotlight each element and create the best output possible. I took the textures and added details to them, tweaked the model proportions to align them as close as I could, and really tweaked the lighting to make the object not look CG, The Final Product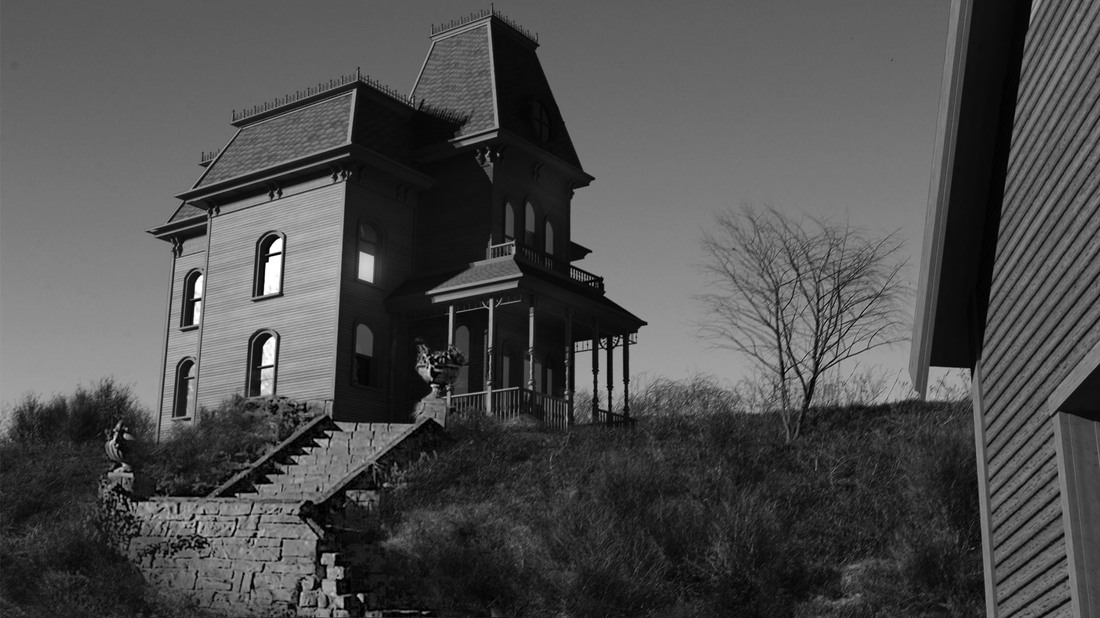
|
||||||||||||