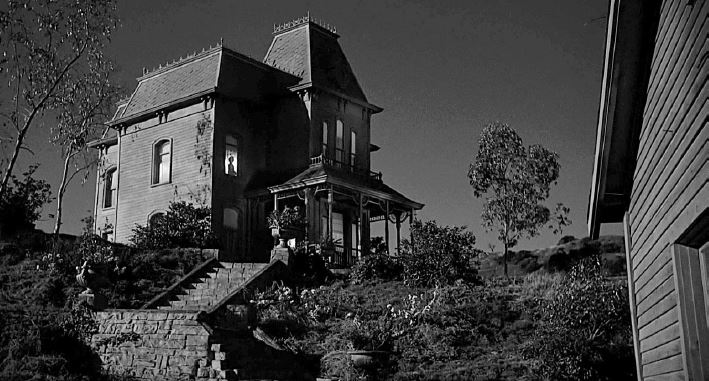
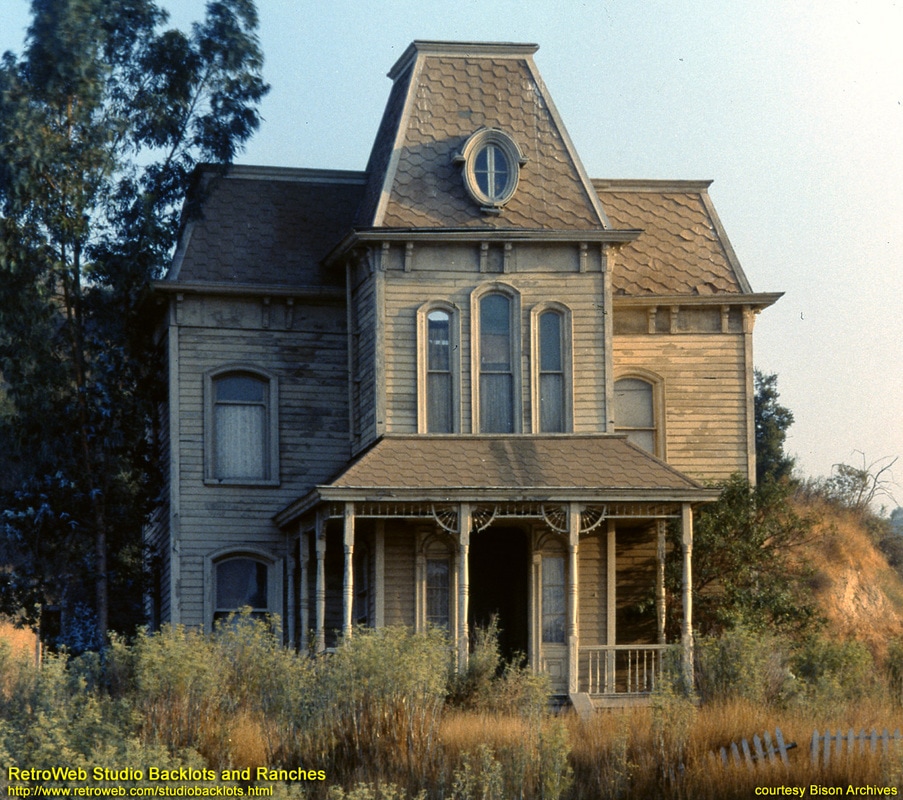
The ChallengeCreate a set extension to match a still frame from a B/W movie. The modeling must be done using only NURBS, and combined with a real-live plate that we took ourselves. Step One: B/W Movie SelectionI began to search the internet to find a compelling shot from an old black and white movie. I searched through many movies including Citizen Kane, Sunset Boulevard, and the Grapes of Wrath. I finally landed on the 1960's Psycho. A classic movie that features a large house behind the Bates Motel. I then was tasked with creating that house and then compositing the rest of the elements into the photo. 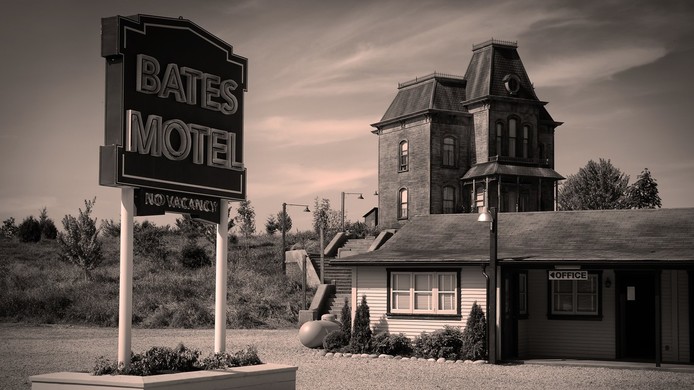 Step Two: Reference CollectionAfter selecting the image above, I began to look up reference from multiple angles of the house. Being a famous house, it was not that difficult. Step Three: NURBS ModelingAt the announcement of only able to use NURBS to model, I was quite unsure of how to do any of this. I had absolutely no experience with NURBS and hardly knew what they were. But I faced it head on and began to test what each command does and looked for tutorials online to help get started. I started creating the wall and window of the lit side of the house. 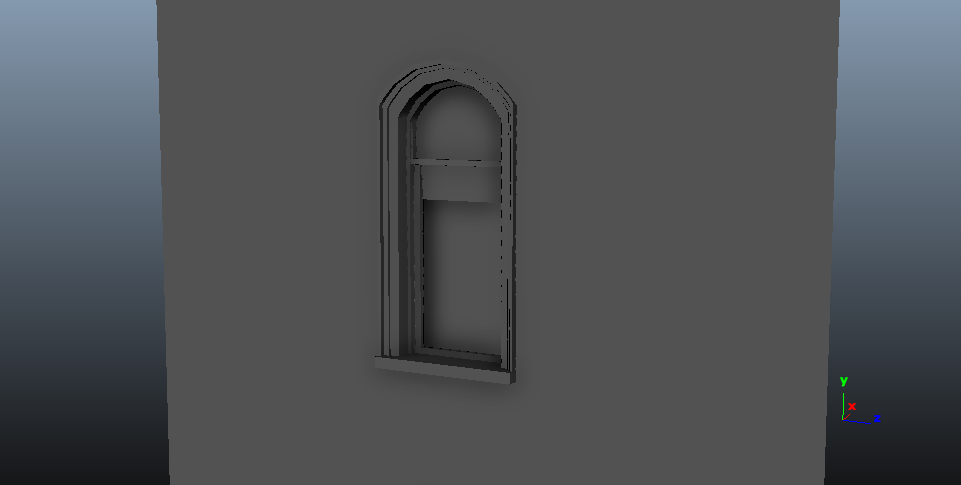 Using curves and projections, this modeling technique threw me into the unknown and out of my area of expertise. However, I began to pick it up. I created the window and that side of the house, then was able to take those foundational pieces and duplicate them over and over again to create the main frame for the entire house. 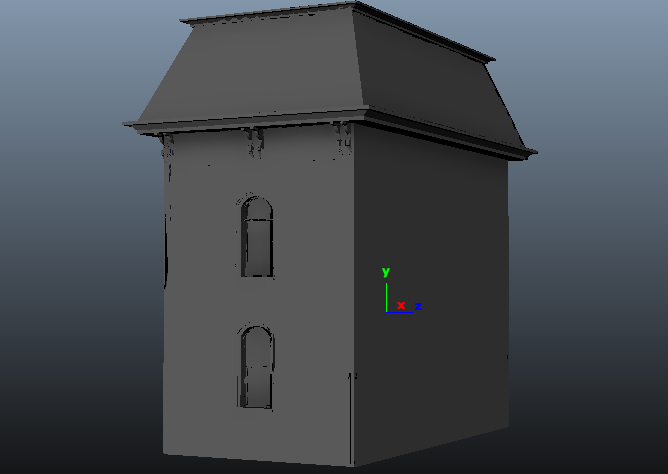 Then it came down to a matter of going in and adding the details. Creating a duplicate special for the spikes on the roof, tweaking the window and window frame positions for each window, and creating the individual circular window in the front. But this quickly formed 90% of the house. 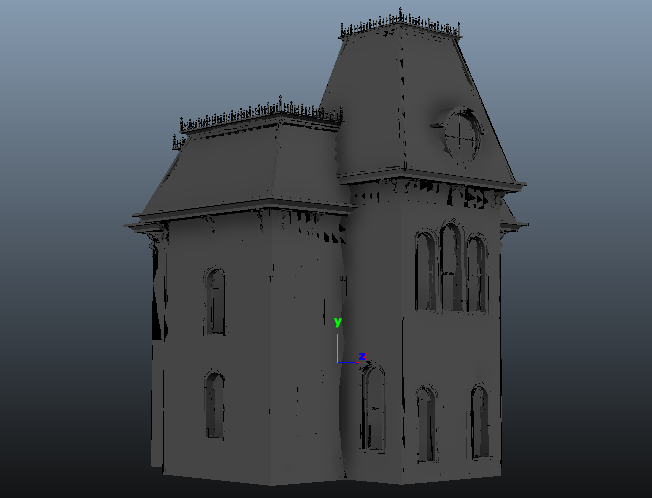 Last was the front porch. After creating the spikes on the roof, this was a very similar process. I started with revolving around curves to create a post and then using a duplicate special for each of the beams to create the equal spacing and the number I want. The only thing I actually had to really create individually fro the porch was the wheels at the top of the posts. But upon completing these final steps the house was completely modeled. 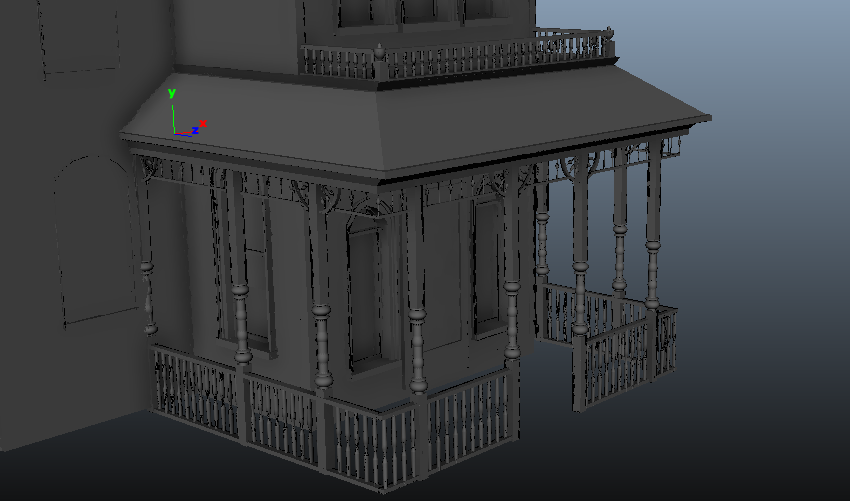 Step Four: Perspective MatchingNow that the model is complete, I then placed the reference image into the scene and tweaked the model a little here and a little there to get it to match up as close as it could to the reference. 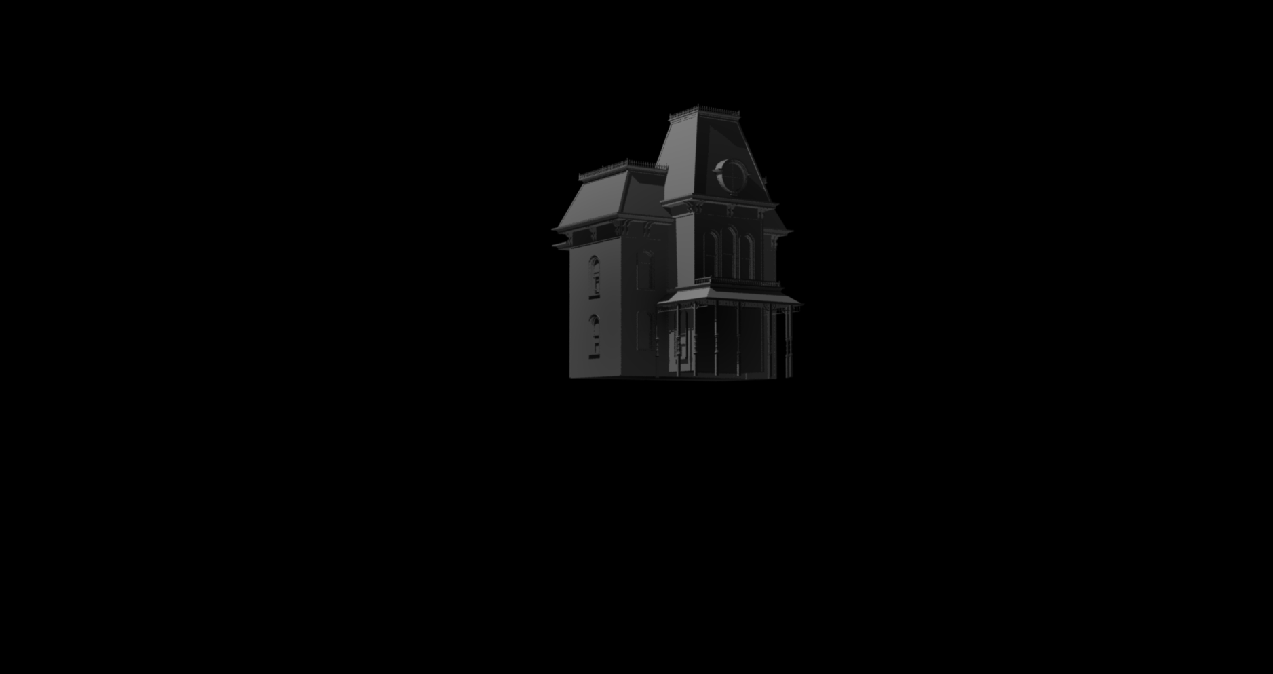 Upon seeing the house in the frame of the photo, I realized that the house only took up a small portion of the whole scene. Therefore, it didn't show off my work as well. So i switched photos and took the same house and found a closer shot, showing the house off more. Step Five: Adjusting for the new photoWith this new photo, I now had to match the house I created to what it looks like at this point in the movie. Taking a closer look, I also realized that the house isn't exactly the same from picture to picture. The stairs infant are completely different, the window frames are in different positions, the roof spikes are different, and just small things here and there I had to change. After I then matched up the new perspective.  Step Six: Modeling Some More I decided once everything was ready to begin surfacing that I could model the building on the right edge of the screen quickly. So I did some quick duplicating and modeled the right building to fit the perspective of the already completed main house. Step Seven: Surfacing... finallyLooking at the house in the photo, there isn't much small details that you can see from so far away. This made my life a lot easier. I simply had to create three or four main textures and tweak them for the whole house. I needed a wood siding, a hexagonal roof, a trim, and a single wood beam texture. I created each one of them procedurally in Substance Designer so that they could easily tile onto the house in the way that I needed them to. 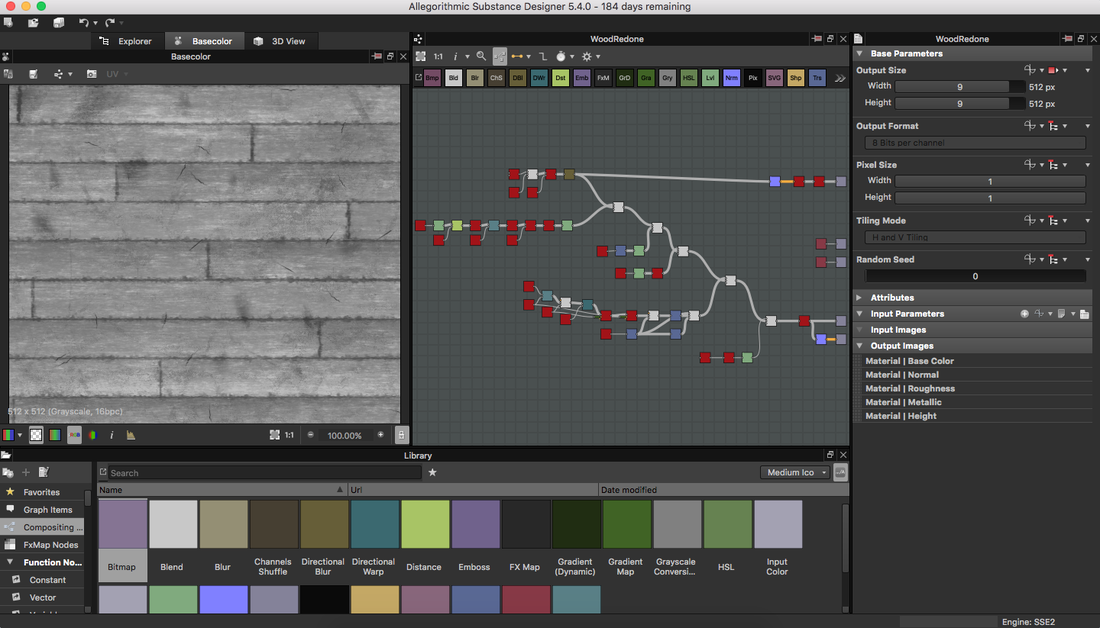 Step Eight: LightingThe first image that I was going to create had a super simple single light source set up. I then switched photos, and the lighting immediately became much more complicated. With the different lights around the front illuminating the dark faces and a light coming from the lit window. As well as the second building in the front, with its own set up. Step Nine: Quick CompositeI then decided to get a good idea of where everything is with a quick composite of the different elements. I took my personal photo of shrubs on a small hill, placed the rendered image from Maya on top, and then took the original stairs from the reference photo on top of that. From this composite, I got critiques as well as a clear picture of what I needed to change in order for it to become as accurate as possible. 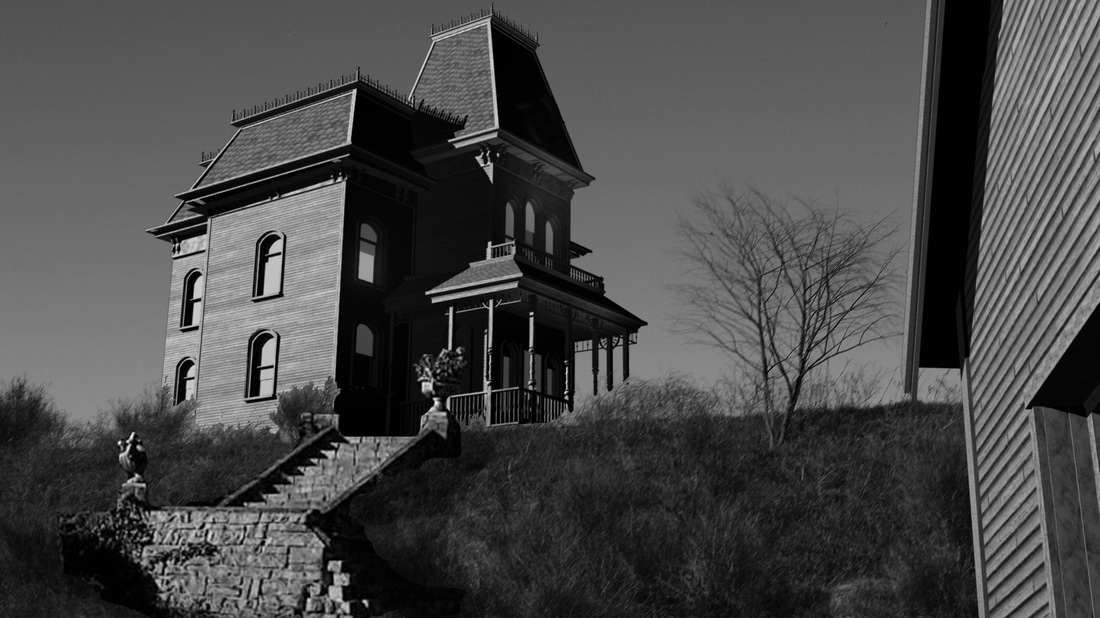 Step Ten: Touchups, Tweaks, and IterationsI took the critiques and started to spotlight each element and create the best output possible. I took the textures and added details to them, tweaked the model proportions to align them as close as I could, and really tweaked the lighting to make the object not look CG, The Final Product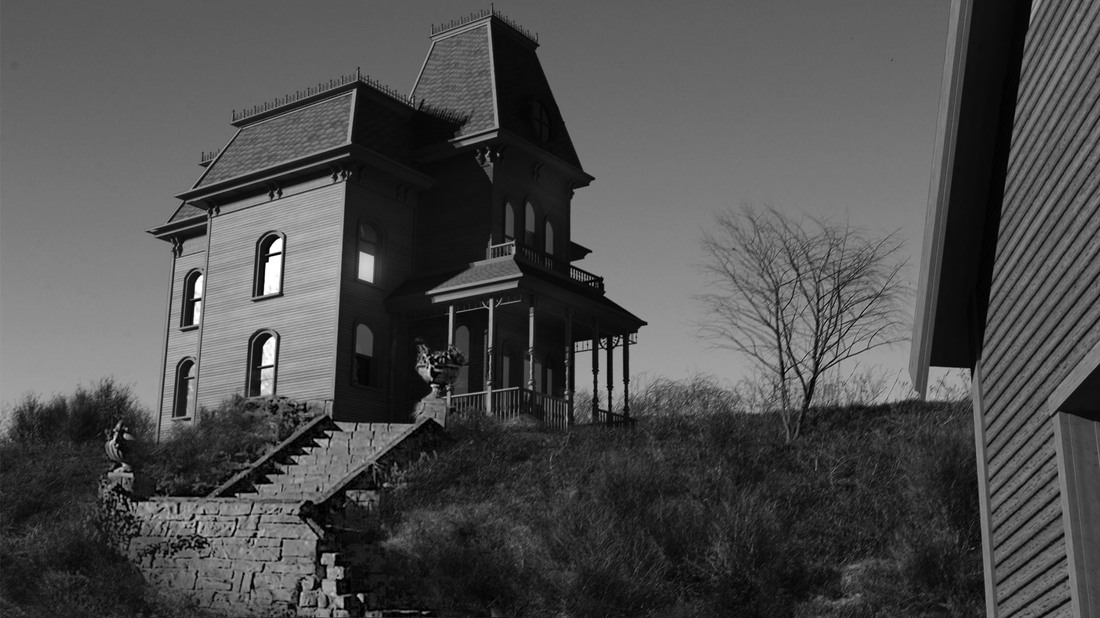
0 Comments
Your comment will be posted after it is approved.
Leave a Reply. |
|||